
I first spotted this flashy number on Pinterest. My friend Anne pinned it, and soon after posted a simple DIY of her own version on her blog, WobiSobi. I wanted a glitter pouch to call my own!
Being the type A perfectionist I am, I had to find a gold pouch with a gold zipper to get as close as I could to the look and style of the original. When cleaning out my handbags last weekend, I found handfuls of long-lost lipgloss and the perfect gold pouch — the little forgotten travel pouch that came with my Dr. Scholl’s Fast Flats.
Pouch in hand, I headed to the craft store for shimmer supplies. Up close, the Kate Spade pouches have a beautiful texture made up of several sizes and shapes of glitter, so I knew one bottle of sparkle just wouldn’t do. I picked a few different types: a traditional gold glitter made of circles, a confetti-style gold glitter that looked like tiny rectangles, and iridescent fairy dust with itty-bitty gold stars.


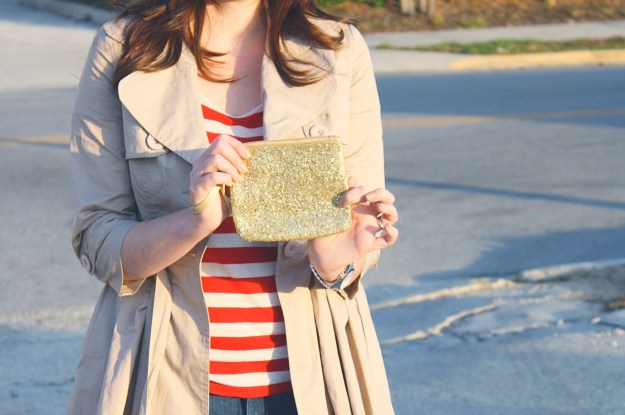
I made a thick paste with the three types of glitter and Mod Podge, and — with my hand inside the pouch — painted the mixture on thickly with a brush on both sides. It took a couple of healthy coats to get the full coverage I wanted, but the entire project took 15 minutes, start-to-finish. I propped the pouch open over a water bottle to dry overnight. Easy peasy, and about $70 saved.


If you want to recreate this project for yourself, look for cosmetic pouches with metallic or brightly colored zippers. Raid your bathroom cabinets for gift-with-purchase makeup bags from the department store. Mix things up with multi-colored glitter or trade the gold for silver. Happy sparkling!

What do you think?