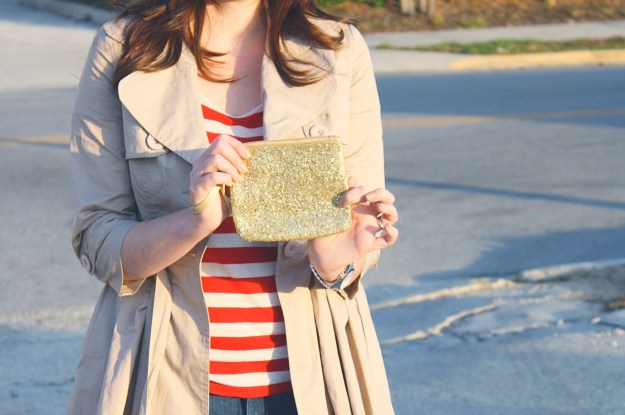
I first spotted this flashy number on Pinterest. My friend Anne pinned it, and soon after posted a simple DIY of her own version on her blog, WobiSobi. I wanted a glitter pouch to call my own!
Being the type A perfectionist I am, I had to find a gold pouch with a gold zipper to get as close as I could to the look and style of the original. When cleaning out my handbags last weekend, I found handfuls of long-lost lipgloss and the perfect gold pouch — the little forgotten travel pouch that came with my Dr. Scholl’s Fast Flats.
Pouch in hand, I headed to the craft store for shimmer supplies. Up close, the Kate Spade pouches have a beautiful texture made up of several sizes and shapes of glitter, so I knew one bottle of sparkle just wouldn’t do. I picked a few different types: a traditional gold glitter made of circles, a confetti-style gold glitter that looked like tiny rectangles, and iridescent fairy dust with itty-bitty gold stars.
I made a thick paste with the three types of glitter and Mod Podge, and — with my hand inside the pouch — painted the mixture on thickly with a brush on both sides. It took a couple of healthy coats to get the full coverage I wanted, but the entire project took 15 minutes, start-to-finish. I propped the pouch open over a water bottle to dry overnight. Easy peasy, and about $70 saved.
If you want to recreate this project for yourself, look for cosmetic pouches with metallic or brightly colored zippers. Raid your bathroom cabinets for gift-with-purchase makeup bags from the department store. Mix things up with multi-colored glitter or trade the gold for silver. Happy sparkling!
Nice work, love the idea. Thanks for sharing.
Thanks for sharing your thoughts on domain. Regards
Thank you for this wonderful idea! I will definitely try this out. …Due to my lack of patience I am not really good in the DIY business ;) … but the fact that the whole procedure took you only 15 mins made it for me ;)
Not only is this super cute, but I also LOVE your coat! Where is it from?!
Love glitter. Love this!!
cute!
Such a great DIY
I definitely need more glitter in my life and this is such a cute, easy idea! Thanks for sharing :)
So cute! I need to do this.
Great idea!! Cute!
Looks fantastic!!!
I am so obsessed with all these glitter DIYs I’ve seen around. Soon everything I own will be covered in glitter! But this pouch is just too cute not to try! ;)
xx Melina
Your pouch came out super cute! Can’t wait to try it!
this is an awesome idea! I can see how great it looks in the sun and I definitely want to try it out! I bought flats like this last month and probably could have saved some money by applying this same method.
How does the pouch fare with the wear and tear? (haha, I totally didn’t mean to rhyme!) Does the glitter stick onto the pouch or does the pouch leave some glitter behind throughout the day?
wonderfull idea, it works like with heels ;-)
This is way too cute, but I confess, I worry. To quote Dmitri Martin, “Glitter is the herpes of craft supplies.” Tell the truth, was the glitter all over when you carried it around? I might have fear of glitter because I have a 2.5 year old and a 6 year old… =)
ITs not an issue when you use modpodge mixture, and if you coat it with a clear coat product of your choice it will seal it. A layer of modge podge can do as well as a layer of spray clear coat. There is a flexible one they sell at Michaels.